
Monday, 16 May 2016
Final Piece
I decided that for my final piece I would like to use slow shutter speed light painting as my primary subject as this I felt was one of my most successful experiments. When taking the photograph I wanted to make the image look as detailed as possible rather than it be completely black, so I altered the aperture and ISO settings in order for the camera to let in more light so that the chair and the area around it were illuminated. I then proceeded to use an LED torch to begin light painting, I chose to make a figure of a person sitting down in the chair as the human body is a very recognizable shape and also gives the image character.

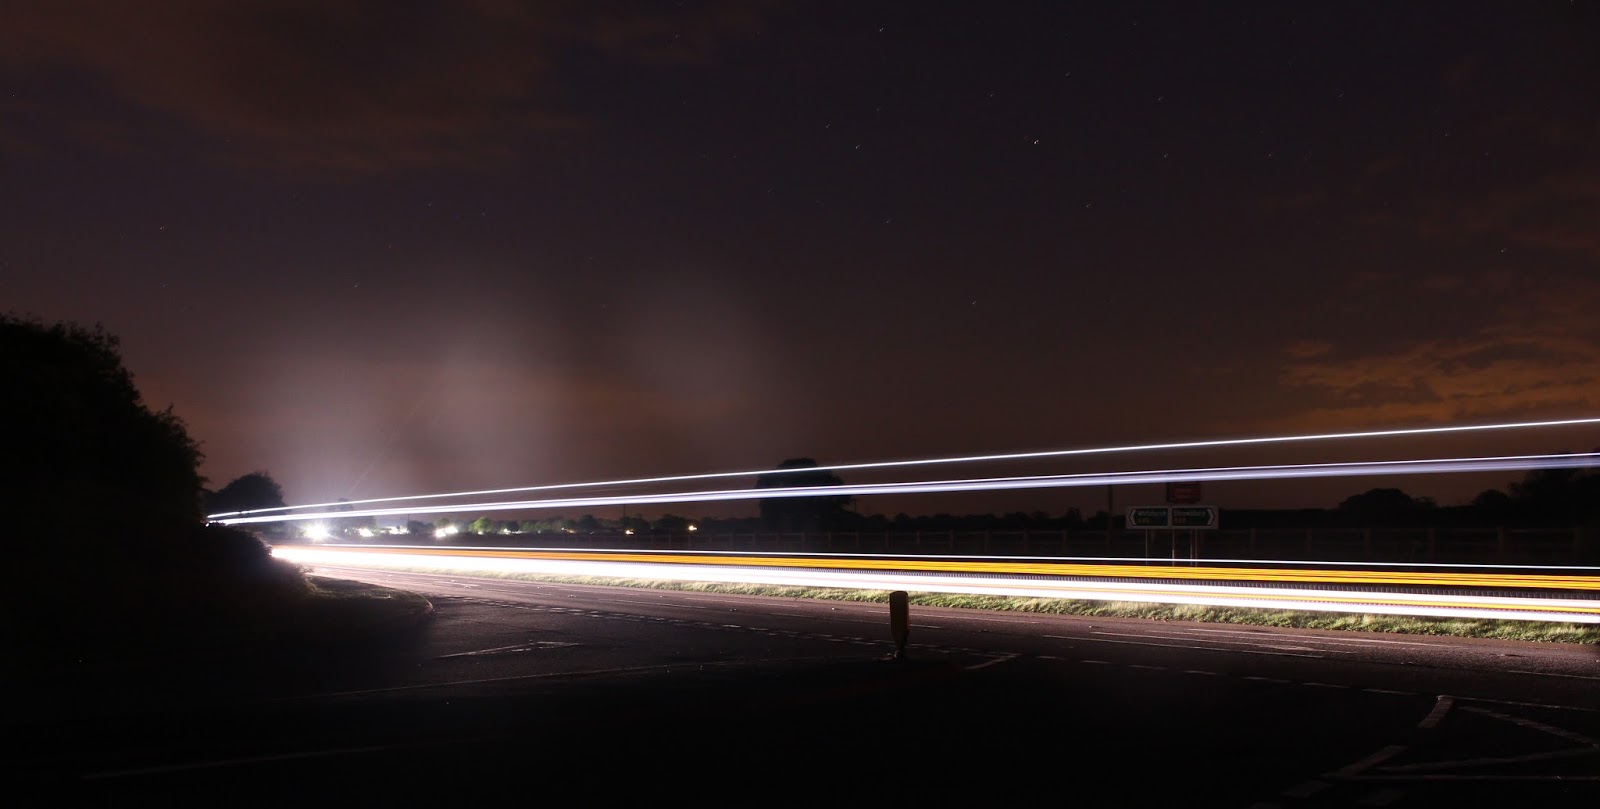
Slow shutter - Traffic
By taking a slow shutter photo besides a road in the middle of the night you can capture light trails and motion blur from the passing traffic that shows movement and direction within a photograph.


I set the camera up on a road side, with a 30 second shutter speed, and then altered the ISO and aperture settings to an exposure that illuminate the scenery but still dark enough to keep a long shutter open for. Here are my results.


Contact Sheet:
Light Painting
Light painting is a form of photography that utilizes the slow shutter speed setting on a camera to allow a light source to move around and create interesting shapes. Typically the shapes 'painted' are made by someone holding a light source (e.g. a torch/ bulb) and moving it around within the frame to create motion blur.


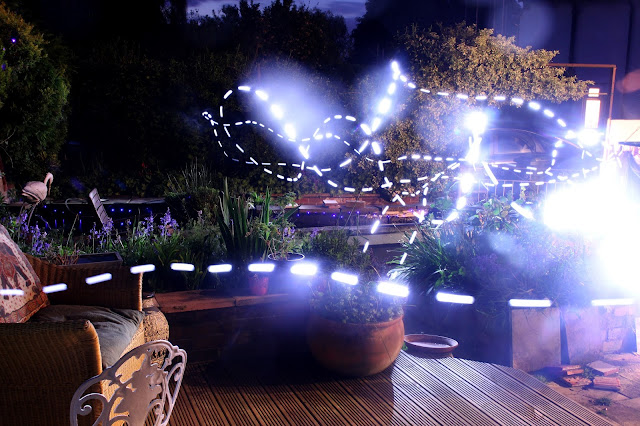


When creating my own light painting I set up my camera in the dark to a 30 second slow shutter speed, set it to the large aperture number (creating a smaller hole) to make the image darker, and then adjusted the ISO settings so that the images turned out dark but not pitch black. I then used an LED torch to move around and make trails of light, Here are my results.


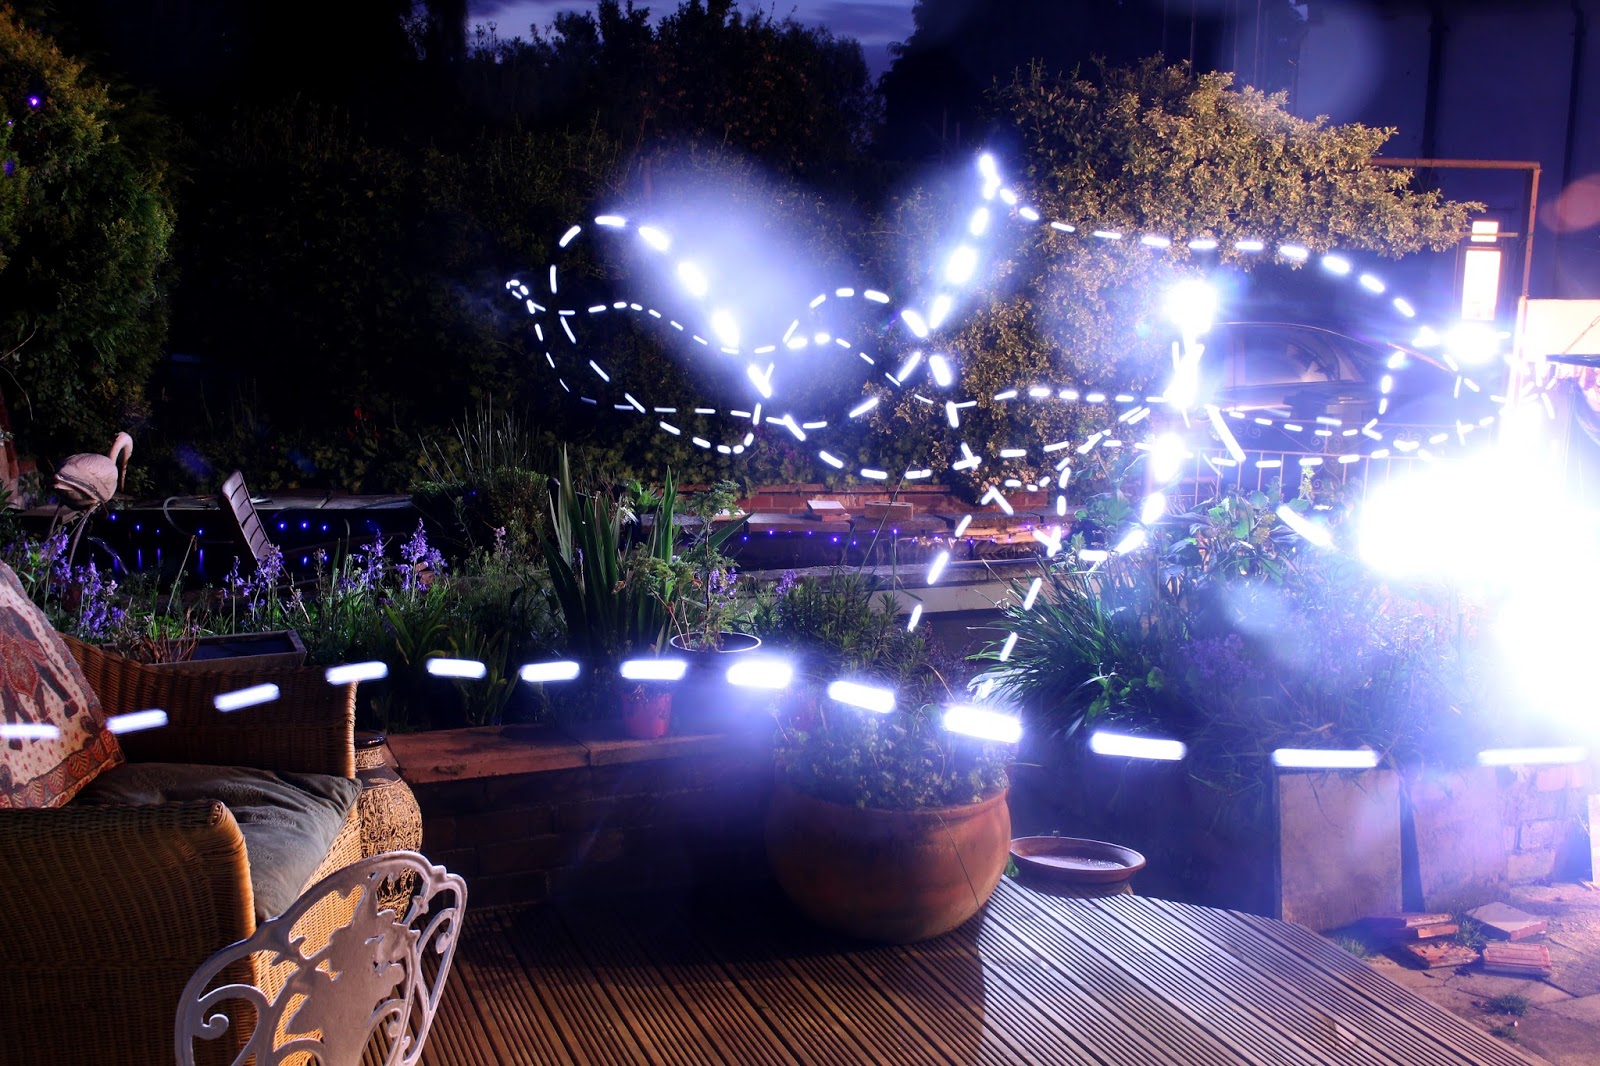
I feel that these turned out to look good, although one of my disliked parts of these images is the very bright smudges where the torch was way too bright. In some of the images I managed to capture bokeh that both looked good and added a surreal look to them.
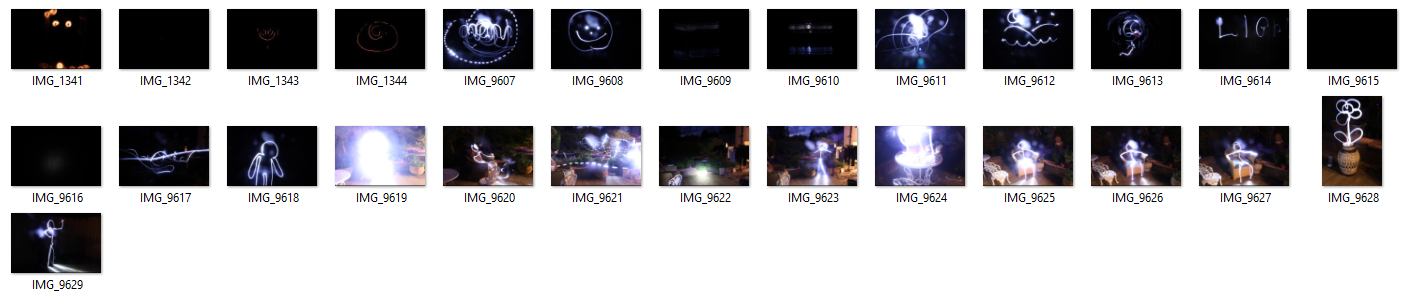
Contact Sheet:
Wednesday, 11 May 2016
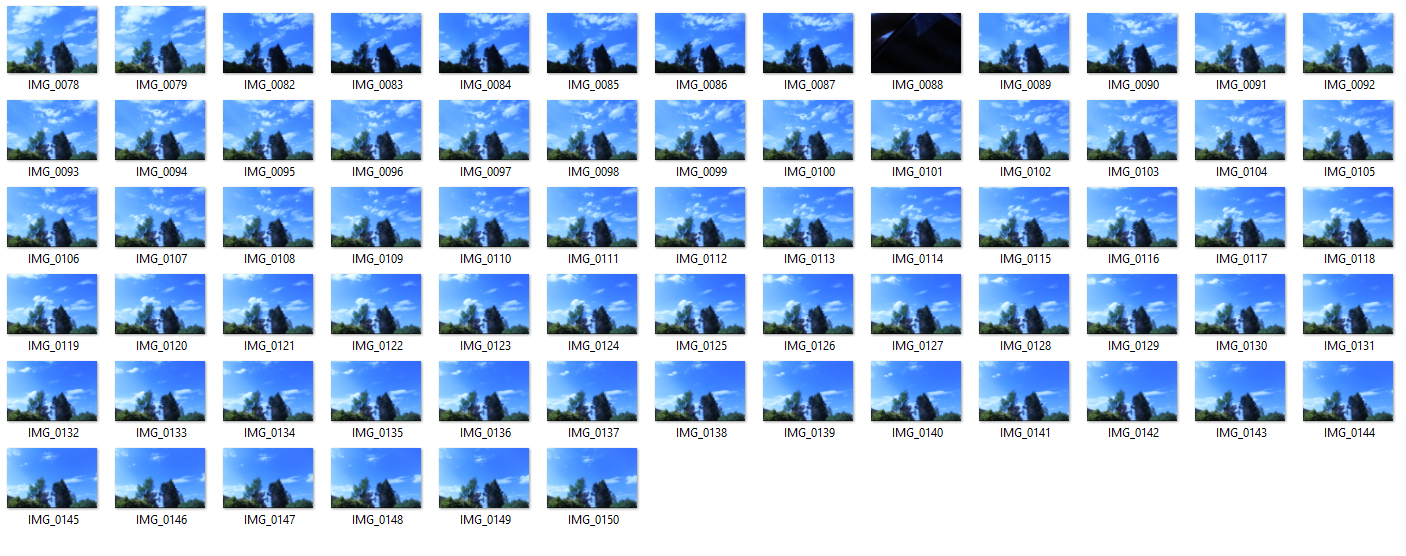
Image Stacking
Image stacking is a method created by taking a series of images of the same subject set at the same angle over a long period of time and overlaying them together in photo editing software in order to capture the movement of the subject. Commonly used in landscape photography, Image stacking allows for some beautiful results when taking images of clouds in the sky and capturing their movement across the sky. I will make an attempt at Image stacking myself and aim to convey the movement and power of the sky within my photos.


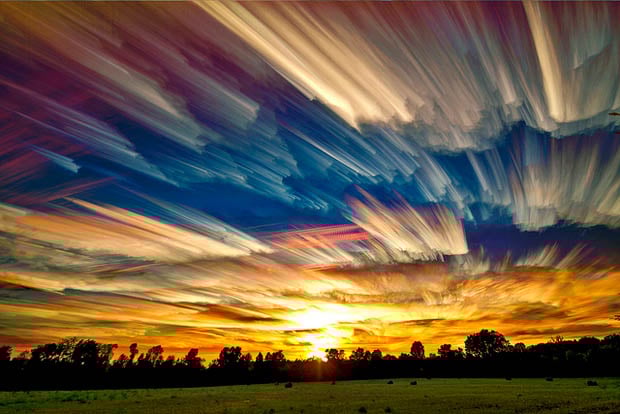
When taking my photos I set my camera on a tripod and pointed it towards the sky. Once I had found some dynamic looking clouds I began to take photos one every 5 seconds for 10 minutes. I then proceeded to take the images into Photoshop where I layered each image over one another and used the 'lighten' blending mode on all but the first image, this meant that only the lighter areas of images were overlaid (mostly in the clouds). Here are my results.


Contact Sheet:
Tuesday, 10 May 2016
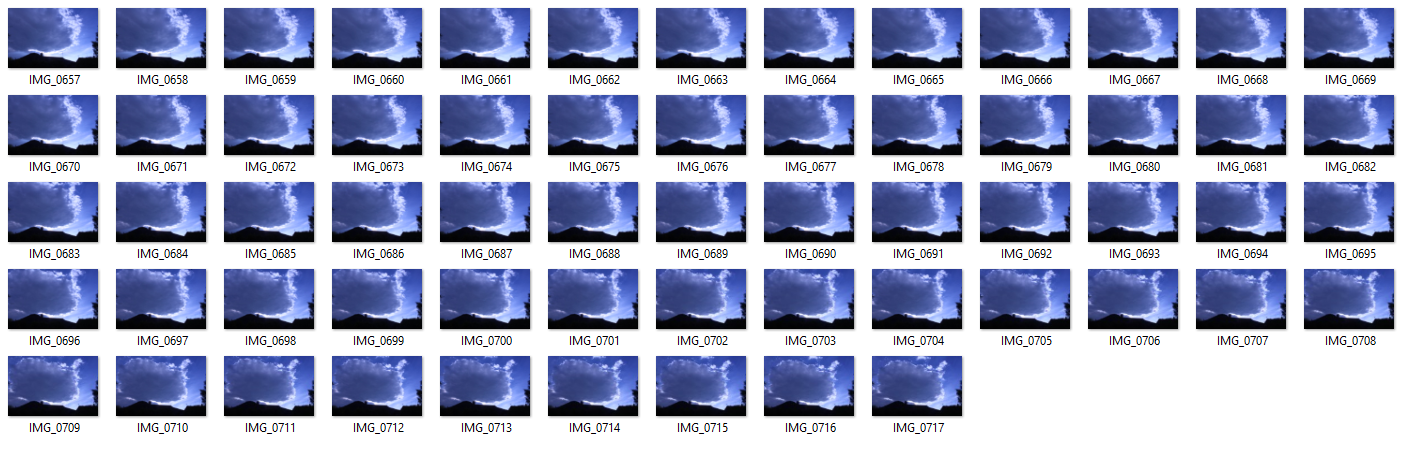
Harold Edgerton Emulation
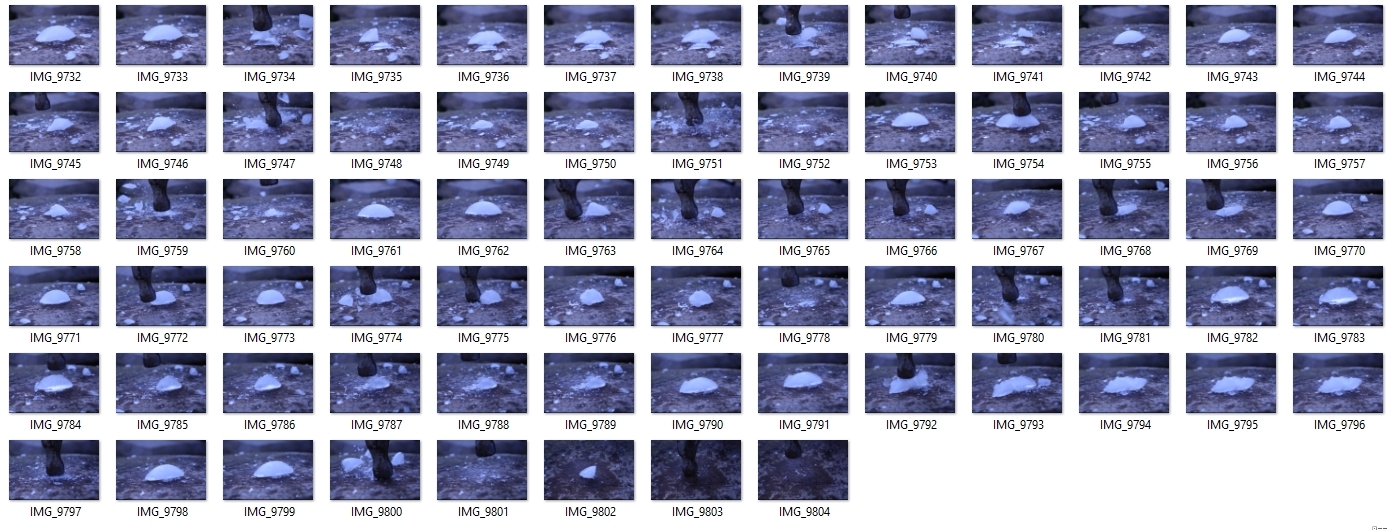
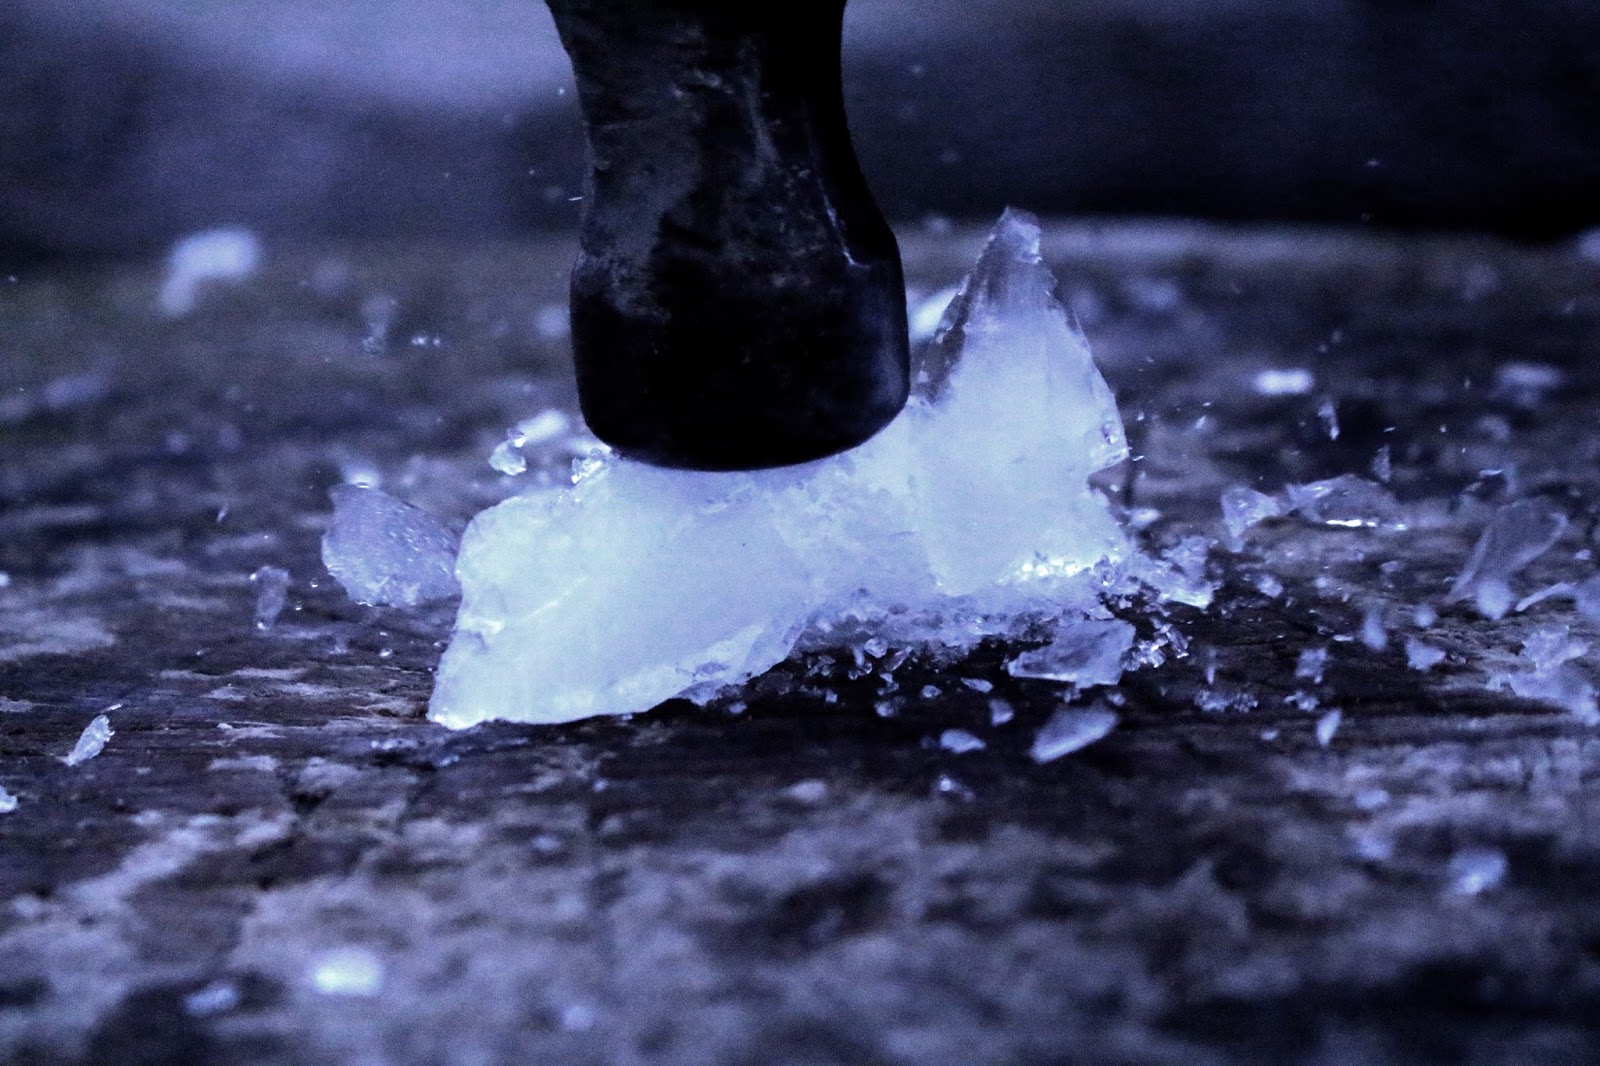
For my Harold Edgerton emulation I wanted to take photos of a hammer hitting an object that would break/shatter on impact. For this I chose to use ice cubes as these have a rather fragile structure and would also shatter like glass in different directions, giving the image a much more dynamic explosion. I began by setting up the camera outside in the sunlight, as the outdoor lighting conditions were perfect for using a fast shutter speed. I set the camera to its fastest shutter speed, lowered the aperture number as to let more light into the lens, and changed the ISO to its highest setting. Once I had the correct exposure and shutter speed on the camera I began to take photos as a helper smashed the ice with a hammer. Here are my results.


I feel that these images have been rather successful and show the impact of the hammer frozen in time. One of the only bad points about these images is that they do suffer from lots of noise, this is due to my use of a very high ISO.


I feel that these images have been rather successful and show the impact of the hammer frozen in time. One of the only bad points about these images is that they do suffer from lots of noise, this is due to my use of a very high ISO.
Contact sheet:
Saturday, 7 May 2016
Yousuf Karsh Emulation
When taking the photos for this shoot I needed to think about placement of the camera, placement of the studio lights and also the positioning of my model. In order to make my models face look as detailed as possible I needed to get a good contrast of lights and dark's. I did this by positioning the studio lights either side of the model, creating heavy shadow on the models face, therefore revealing all of the models facial details. Once everything was setup against a black background I attached the camera to one of the studio lights flashes and set my camera to a fast shutter speed and a high aperture, insuring that the areas of the image that were not illuminated by the studio lights were dark. The flash was also set to a low brightness as this meant no area of my model would be over exposed by the studio lights. Post process editing software then allowed me to use adjustment layers to add black and white effects and further alter the levels and contrast of the image.


I personally feel that this emulation of Yousuf Karsh's work has been a great success, as I feel my photos have really captured the minor details of each of my models faces, just as Karsh had achieved with many of his subjects.


I personally feel that this emulation of Yousuf Karsh's work has been a great success, as I feel my photos have really captured the minor details of each of my models faces, just as Karsh had achieved with many of his subjects.
Contact Sheet:
Tuesday, 26 April 2016
Bragaglia Brothers Emulation
As an emulation of the Bragaglia Brothers Style of Photography, I set up a studio with a black screen and a flash and began to take photos of my model. I set the camera to an extremely long shutter speed of around 10 seconds, setting the ISO to its lowest exposure, insuring that the images would stay dark enough for the image to work. While taking the photographs I needed to use a flash to light up my models face as they moved in the dark, therefore I had to manually operate the flash. This was because my model needed to move while the studio was dark and be still during the flash, making it so that as they moved and the flash illuminated them the slow shutter of the camera would capture each position they moved to all in one image. I then proceeded to Photoshop to add a black and white effects layer over the images to make them seem a little more true to the artists style. With one specific image of the male model, I added a motion blur effect within Photoshop, this was to add a sense of motion to the image and also to yet again reflect the artists style.


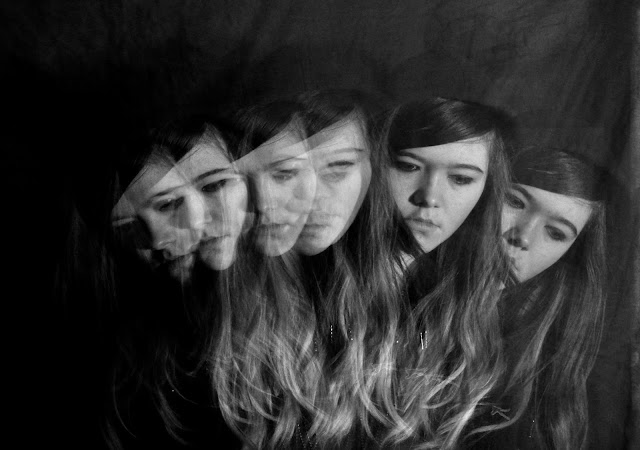


I am happy with the results I got from these images, I used my own method of using a succession of flashes rather than the continuous movement and motion blur of the Bragalia Brothers method.
Contact Sheet:
Subscribe to:
Posts (Atom)